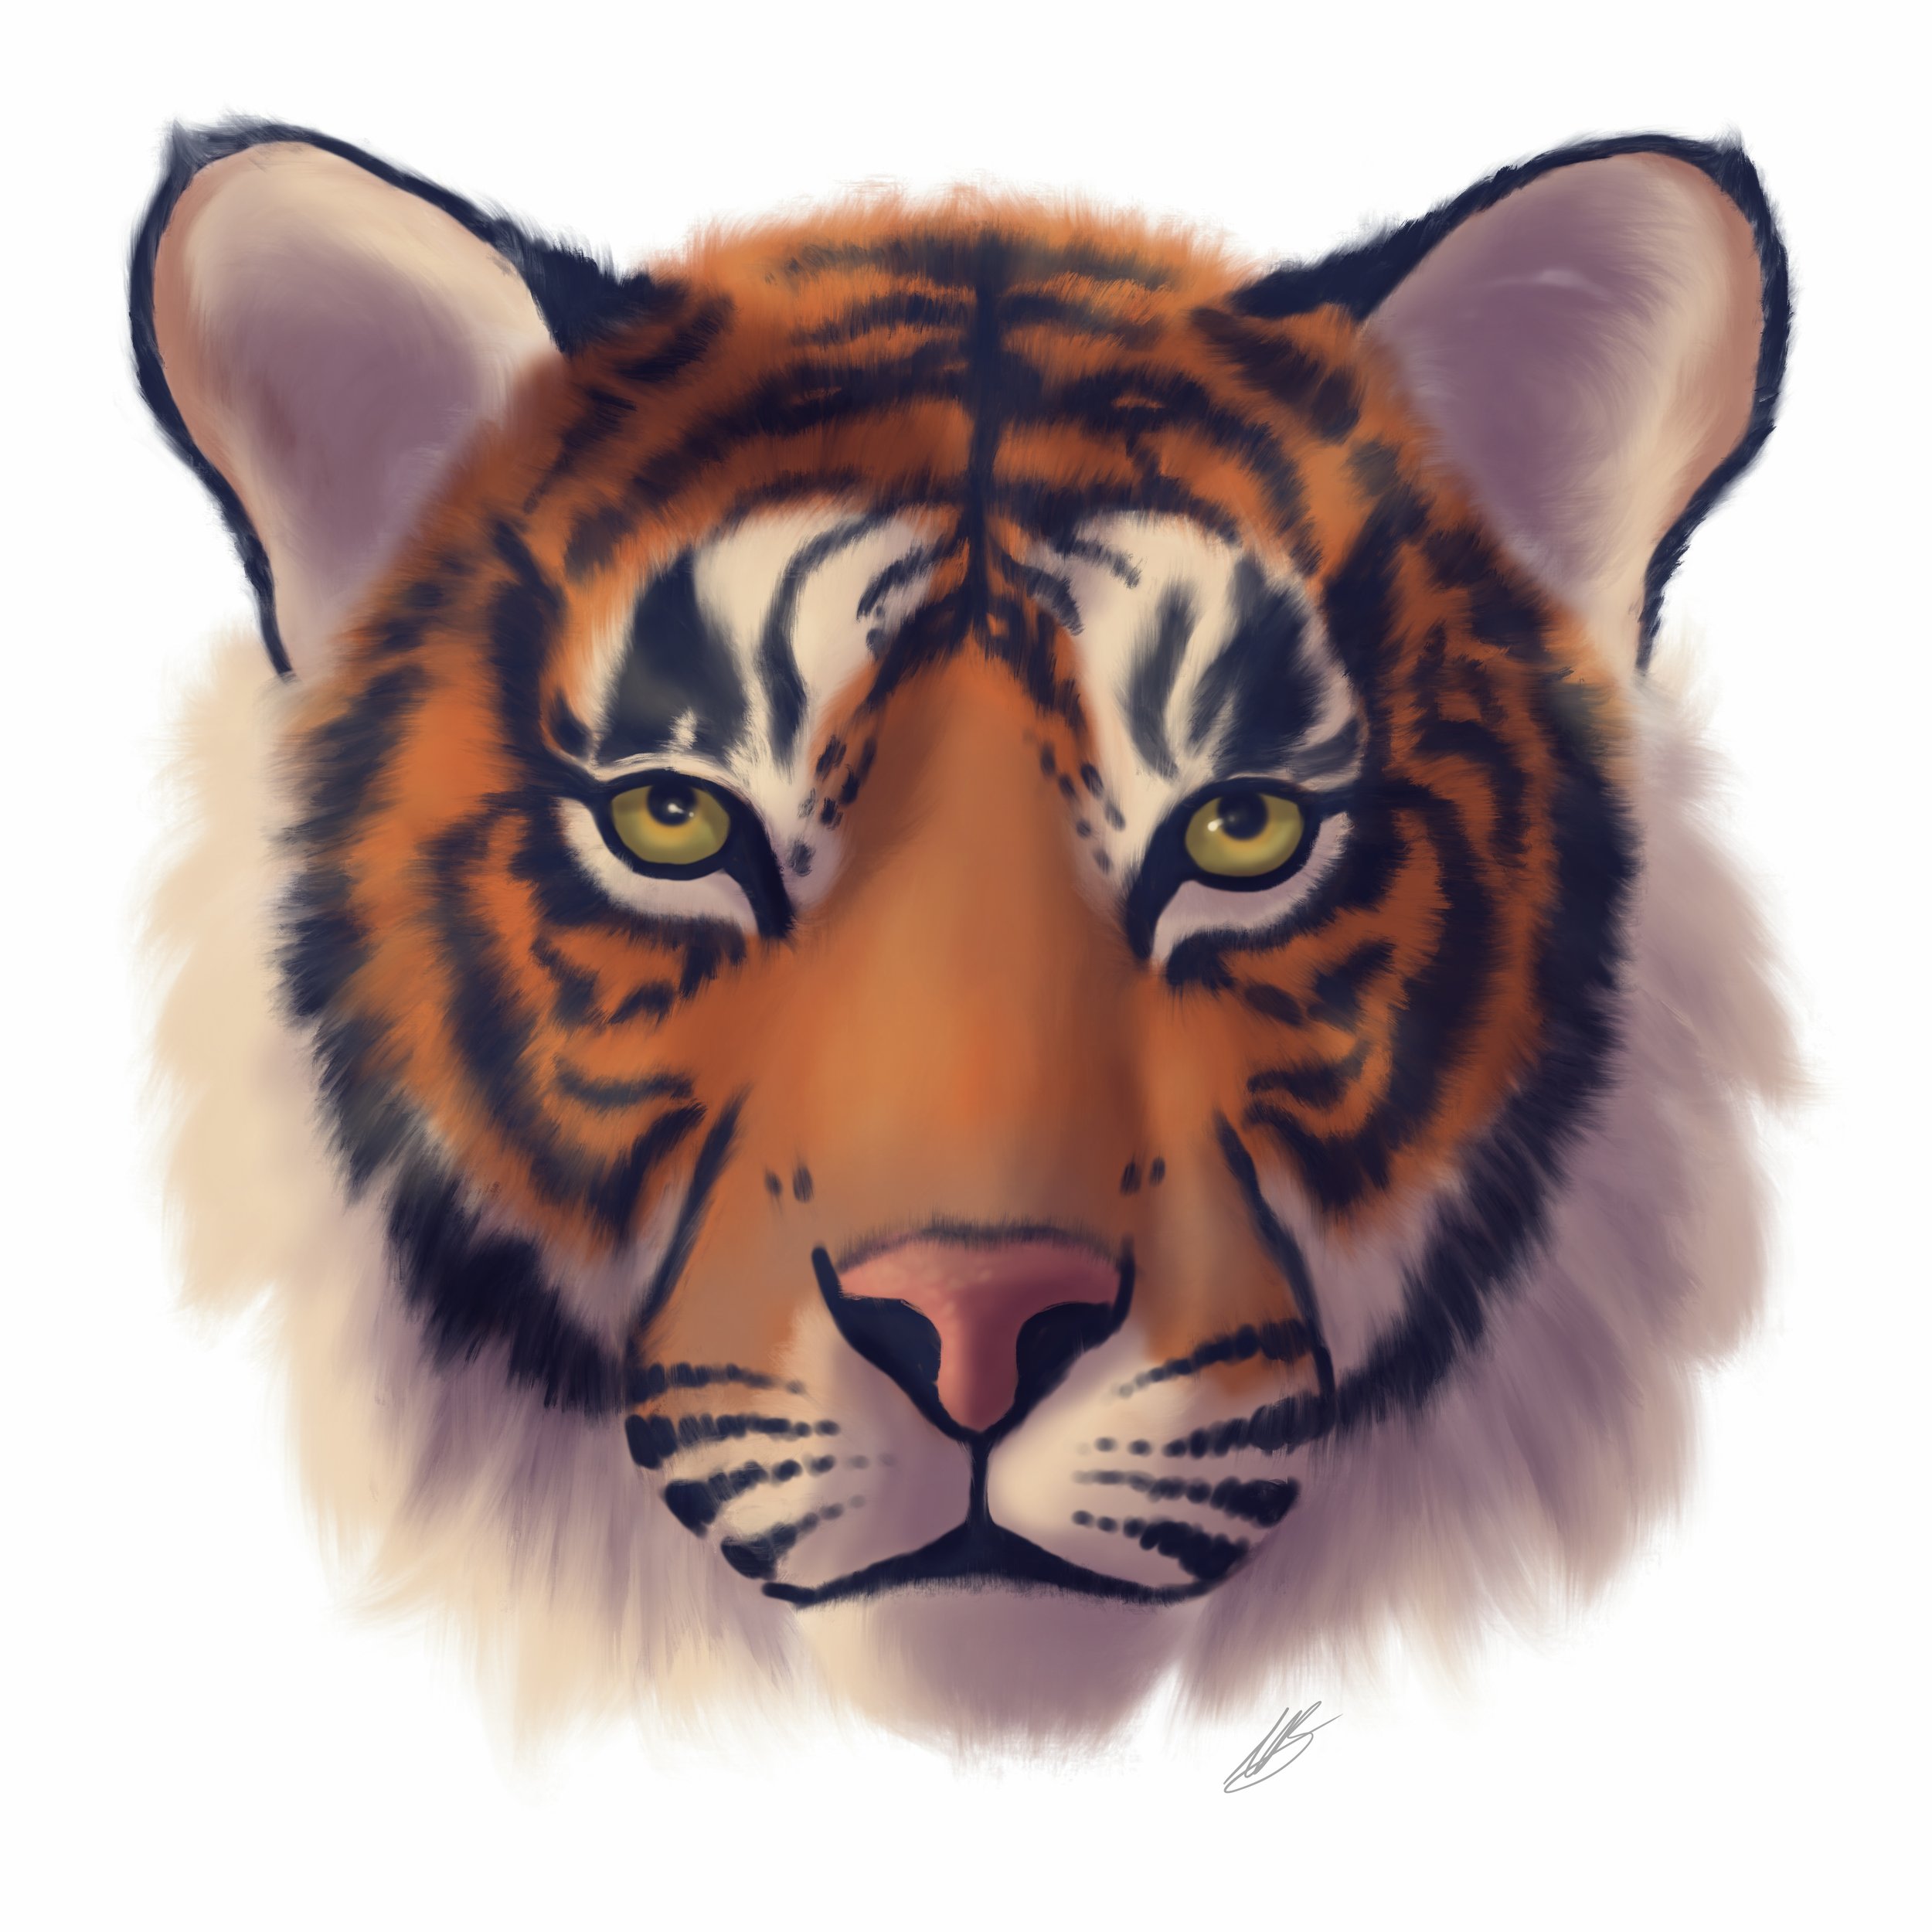
Draw and Paint A Tiger: Steps and Process
How to draw and paint a tiger head.
For this tutorial, I am assuming you have some understanding of the layer settings for your program of choice.
If not, I recommend you search to see how the different functions mentioned are created in your program choice.
You can see how to use similar techniques in Adobe Fresco in my post here.
Let’s draw and paint a tiger head!
My Setup
For those who like to follow using the same tools, here is my set-up for this illustration.
Materials:
iPad Pro 2020 12.9”
Apple Pencil 2nd Generation
Procreate
Brushes, both are basic that come with the program:
Soft Airbrush - used for sketching, stripes, lights, darks and painting the base colours.
Turpentine Brush - used with the smudge tool to create my fur texture.
Canvas:
15” x 20” - perfect for t-shirts.
RGB
Sketch and Stripes
When sketching your tiger, don’t be afraid to re-draw it many times before you are happy with it. The better your sketch, the better the finished result will be.
Stripes can feel daunting, but if you take your time and use this opportunity to practice patience, you’ll be fine.
There are a couple of important points to keep in mind as you paint your stripes:
All tiger stripes are different just like our fingerprints are unique to us, tiger stripes are unique to the tiger.
The stripes on both sides of a tiger will differ slightly so don’t worry about making an exact copy.
Try not to copy and paste one-half of the stripes to the other, this will make your illustration look unnatural.
To create a “fur” look, you can use a fur/hair brush in your chosen program or use the smudge tool.

Local Colours
Paint in your “local” colours? What do I mean by this? You may ask. Local colours are those that have not been influenced by light and dark.
Add variation of colour where you can to create interest in your illustration.
Similarly to creating the fur texture for the stripes in the previous step, you can use the same brush and technique here too.

Light, Dark and Details
Using an airbrush, paint your lights on one layer and shadows on another.
For a simple way to add light and dark, you can add a screen layer type for lights and a multiply layer type for darks. Layer types can be set using the layer options panel - this varies from program to program so do a quick search to see how to do it.
Experiment with the opacity of the layers to see what looks best to you.
To add more depth to my painting, I used the smudge tool to blend my fur using the same brush I used to create fur. I also added another layer to deepen some of the shadows.

Final Illustration
If you follow along with this little tutorial, be sure to tag my on Facebook or Instagram @artofcharmaine.
This illustration is available as a postcard or print in my studio shop.